


How to Clone Plants: A Practical Indoor Guide
A healthy stem cutting can become a new plant that carries the parent plant's traits. The reliable way to learn how to clone plants is to control the few variables that matter most: healthy parent growth, clean tools, a well-placed node, steady moisture, and a humid rooting environment. Prepare those conditions before making the cut, and propagation becomes a repeatable indoor gardening process rather than a guessing game.
Explore cloning gels and rooting solutions
What Does It Mean to Clone a Plant?
Plant cloning is a form of asexual propagation. You take a piece of a healthy parent plant, usually a stem cutting, and encourage it to produce roots. The rooted cutting then grows as a new plant with the parent plant's genetic traits. A practical cutting is usually about 3 to 6 inches long and includes at least two or three nodes. Remove the lower leaves, keep the stem in a clean, evenly moist medium, and protect the foliage from excessive moisture loss while roots develop.
Unlike seed propagation, stem cutting propagation does not begin with a seed or require pollination. It begins with living tissue from a plant that already has the characteristics you want to repeat. That can include growth habit, leaf form, vigor, or a useful response to an indoor environment. North Carolina State Extension explains stem-cutting propagation and why the cutting needs the right balance of moisture and oxygen.
How to Clone Plants Without Overwatering New Cuttings
Moisture management is the central balance in a propagation setup. A cutting needs enough moisture to limit wilting, but its stem and developing roots also need air. Start with a medium that is evenly damp rather than saturated. If water pools in the tray, drains slowly, or leaves the stem soft, reduce the amount of water and improve drainage before adding more humidity.
A humidity dome helps slow moisture loss from leaves, but it does not replace drainage or airflow. Use the dome as temporary protection, watch condensation, and open the vents gradually as the cutting becomes established. This approach answers a common question about how to clone plants: success comes from maintaining a stable environment, not from keeping every surface wet.
Why nodes matter
A node is the point on a stem where a leaf, branch, bud, or aerial root emerges. Nodes contain active growth tissue, so they are the most useful locations for new roots. Place at least one healthy node below the surface of the rooting medium. Keep the leaves above the surface. Buried foliage can decay and create a path for disease, while exposed foliage helps the cutting continue producing energy.
The exact cutting length depends on the plant, but 3 to 6 inches is a practical starting range for many soft-stemmed houseplants, herbs, leafy greens, and vegetables. A very short cutting may not contain enough nodes. An oversized cutting can lose moisture faster than it can replace it. Choose a piece that has viable growth tissue without unnecessary leaves or stem length.
Choose the right parent plant
Start with a parent that is healthy, actively growing, and free of visible pest or disease problems. Select firm, undamaged, non-flowering growth whenever possible. A weak parent plant may produce weak cuttings, and a cutting cannot correct poor starting conditions on its own. Cloning preserves the parent plant's strengths and weaknesses, so choose a plant you would genuinely want to grow again.
Label each cutting with the plant type and date if you are working with more than one variety. Simple labels prevent mix-ups and make it easier to compare rooting progress. They also turn each propagation cycle into useful information for the next one.
What Supplies Do You Need to Clone Plants?
Gather the supplies before cutting the parent plant. The exposed stem should move into its rooting environment quickly, and a prepared workspace reduces handling and contamination. Each item has a clear purpose: making a clean cut, keeping the cutting upright, limiting moisture loss, or giving developing roots a balanced supply of moisture and air.
Cutting and preparation supplies
- Clean, sharp shears or a propagation knife: A sharp blade makes a clean cut with less crushing. Clean the tool between parent plants to reduce the chance of spreading pests or disease.
- A healthy parent plant: Select vigorous, non-flowering growth with no obvious damage, discoloration, or pest activity.
- Labels and a waterproof marker: Record the plant type and cutting date, especially when multiple varieties share a tray.
- A clean work surface: Remove old plant debris and keep a spray bottle, paper towels, or gloves nearby for orderly handling.
Rooting and environmental supplies
- Rooting hormone: Gel, powder, and liquid formulas are available. Hormone is optional for some plants, but it can support more consistent root initiation when used according to the product label.
- Rooting medium: Choose a clean plug, propagation cube, perlite blend, or other suitable medium that holds moisture without becoming waterlogged. GroIndoor's hydroponic systems collection includes equipment for growers who prefer a managed water-based setup.
- A propagation tray or small containers: Use a container that supports the cutting and drains excess water.
- A humidity dome: A dome slows moisture loss from leaves while roots are absent. It should be vented gradually as the cutting becomes established.
- Gentle light and stable temperature: Bright, indirect light supports the cutting without creating excessive heat. A steady indoor environment is easier to manage than a location with sharp temperature swings.
Do not treat a wet setup as a healthy setup. Developing roots need oxygen as well as water. If the medium is saturated, the stem can soften before roots form. The goal is evenly moist material with enough air space to support new root growth.
Shop propagation and rooting supplies
How to Clone Plants From Stem Cuttings
The process below works as a practical framework for suitable indoor plants. Species vary, so use the plant's known propagation requirements when they differ from this general method. Keep the work clean, move deliberately, and change one variable at a time if a cutting struggles.
- Select a vigorous shoot. Choose active, non-flowering growth from a healthy parent. Avoid tissue that is wilted, damaged, diseased, or carrying visible pests.
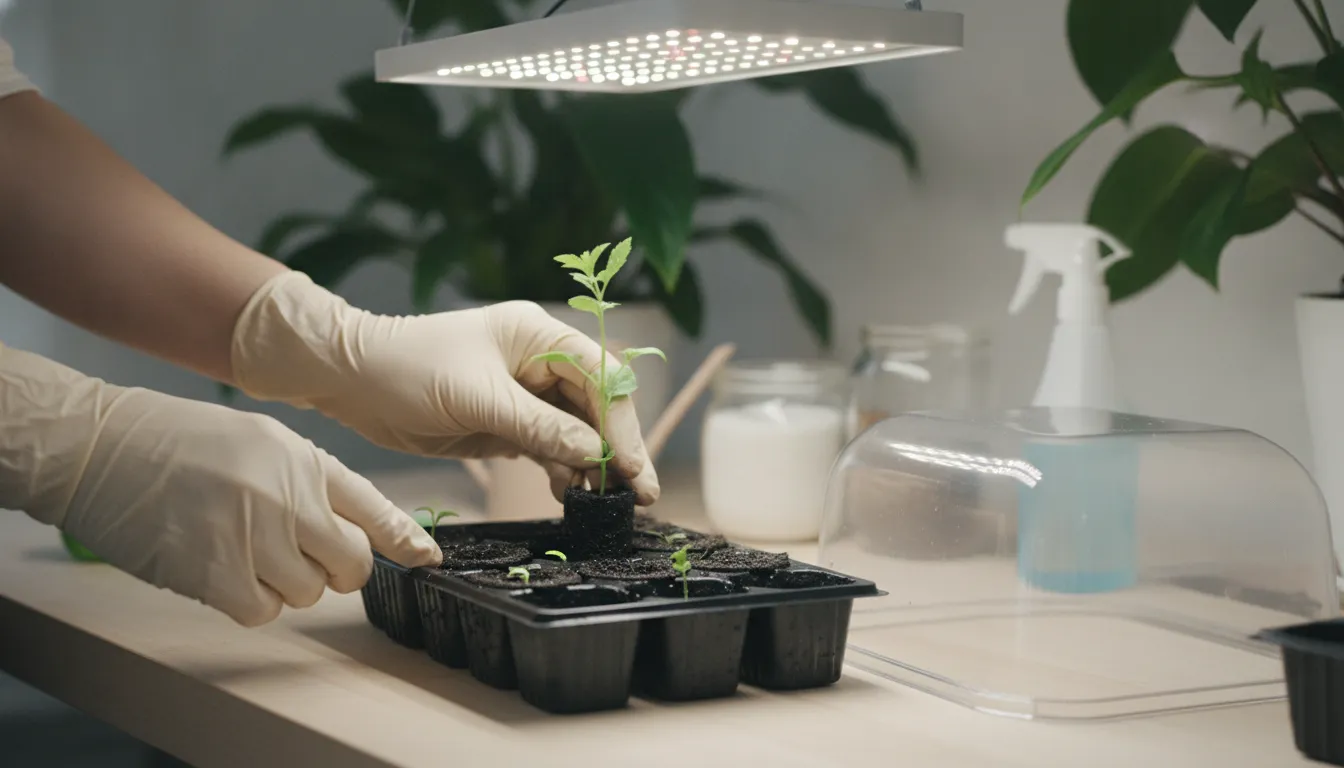
- Prepare the rooting environment. Moisten the rooting medium so it is evenly damp, not dripping. Fill the tray or container, set the humidity dome nearby, and make a planting hole before taking the cutting.
- Make a clean cut. Use a sharp, sanitized tool and cut the stem just below a node. A cutting about 3 to 6 inches long with two or three nodes gives you useful room to position the stem.
- Remove lower leaves. Strip leaves from the section that will enter the water or medium. Keep a small amount of foliage above the surface so the cutting can continue to support itself.
- Apply rooting hormone if appropriate. Dip or coat only the portion that will enter the medium, following the product directions. Avoid contaminating the container by touching the applicator to used plant material.
- Place the cutting in the medium. Insert the stem far enough to cover at least one node while keeping leaves above the surface. Press the medium gently around the stem so it stands upright without compacting the root zone.
- Set the light and humidity. Put the tray in bright, indirect light. Cover it with the dome, then check daily for excessive condensation, wilting, discoloration, or drying.
- Vent the dome gradually. Once the cutting shows firm new growth or clear root development, open the vents for short periods. Increase airflow in stages rather than removing the dome suddenly.
- Check for roots before transplanting. Look for several healthy roots, firm new growth, and a cutting that stays upright when the dome is briefly opened. Do not pull repeatedly to test the root system, because that can damage new roots.
Clean technique matters at every step. Do not reuse stagnant water, contaminated tools, or old medium. If multiple cuttings are being processed, keep the workspace organized and remove any cutting that shows obvious decay before the problem spreads.
How Do Humidity, Light, and Temperature Affect Rooting?
A cutting has no established roots to replace the moisture it loses through its leaves. The propagation environment should therefore reduce water loss without eliminating airflow. A humidity dome can help, but it does not make overwatering safe. Keep the medium evenly moist, watch the leaves, and use ventilation to prevent a stale, overly wet enclosure.
Use a humidity dome as a temporary tool
Place the dome over the tray after the cutting is inserted. Condensation on the inside is normal, but heavy dripping or standing water is a warning that the enclosure may be too wet. Wipe excess water when needed and open the vents for short periods. As the cutting begins to root, gradually increase ventilation so it can adapt to lower humidity.
Choose moderate, indirect light
Strong direct light can heat the dome and increase leaf-level water loss. Very low light can slow the cutting's progress and encourage weak growth. Use bright, indirect light or a gentle grow light positioned according to its instructions. Keep the light schedule consistent and watch the plant rather than assuming that more intensity is always better.
Keep temperatures steady
Rooting is easier to monitor in a stable environment. Avoid placing the tray next to a heating vent, cold draft, or hot window. Temperature changes can increase stress and make it harder to tell whether a problem comes from moisture, light, or the cutting itself. A simple daily observation routine is more useful than frequent adjustments.
Indoor conditions can shift with the season. For broader environmental planning, GroIndoor's guide to controlling humidity in a grow tent provides related context. A beginner grow tent guide can also help when a dedicated enclosure is part of the propagation setup.
Should You Root Cuttings in Water or Growing Medium?
Both approaches can work. The better choice depends on the plant, your ability to monitor moisture, and where the cutting will grow after roots form. Water makes root development easy to see, while a plug or soilless medium can reduce the shock of moving the new root system later.
| Method | Advantages | Watch-outs | Best fit |
|---|---|---|---|
| Water | Root growth is visible and supplies are simple. | Roots may need a careful transition into a medium. | Plants that root readily in water and beginners who want to observe progress. |
| Propagation plug or soilless medium | The root system begins in a transplantable environment. | Moisture must be balanced carefully. | Cuttings moving into containers or hydroponic systems. |
| Aeroponic cloner | Stem bases receive moisture while remaining exposed to air. | The system requires cleaning, monitoring, and reliable operation. | Repeated propagation or higher-volume indoor setups. |
Water propagation is not automatically cleaner or safer. Replace stagnant water, keep leaves out of the water, and move the cutting when roots are developed enough to handle the transition. If you root directly in a medium, check that the stem is supported and that the material does not dry out between observations.
For a more equipment-focused option, a 140-site aeroponic cloner can support larger propagation batches. Choose a system that matches your capacity and maintenance routine rather than buying more sites than you can monitor.
How Do You Transition Rooted Clones Into New Media?
Transplant when the cutting has a genuine root system, not simply because a certain number of days has passed. Look for several healthy roots, firm new growth, and a cutting that remains upright when humidity is reduced briefly. Fresh roots should look substantial and clean. Brown, slimy, or foul-smelling roots indicate a problem that should be addressed before transplanting.
Harden the cutting first
Increase ventilation gradually before the move. A cutting that has lived under a closed dome may wilt if it is transferred directly into a dry environment. Open the dome for short periods, extend those periods over several days, and observe the leaves. Delay the transplant if the cutting cannot remain firm as humidity decreases.
Prepare the new medium
Use a clean container and a medium that matches the next growing system. Pre-moisten the material so the new roots do not enter a dry pocket. Leave enough space around the root system for even contact, but do not compress the medium tightly. Roots need both moisture and air.
Plant at the correct depth
Support the root system without bending or crushing it. Cover the roots and the lowest portion of the stem, but keep leaves above the surface. Water or irrigate carefully so the medium settles around the roots without becoming saturated. Keep the plant in moderate light while it recovers, then return to its normal environment as new growth resumes.
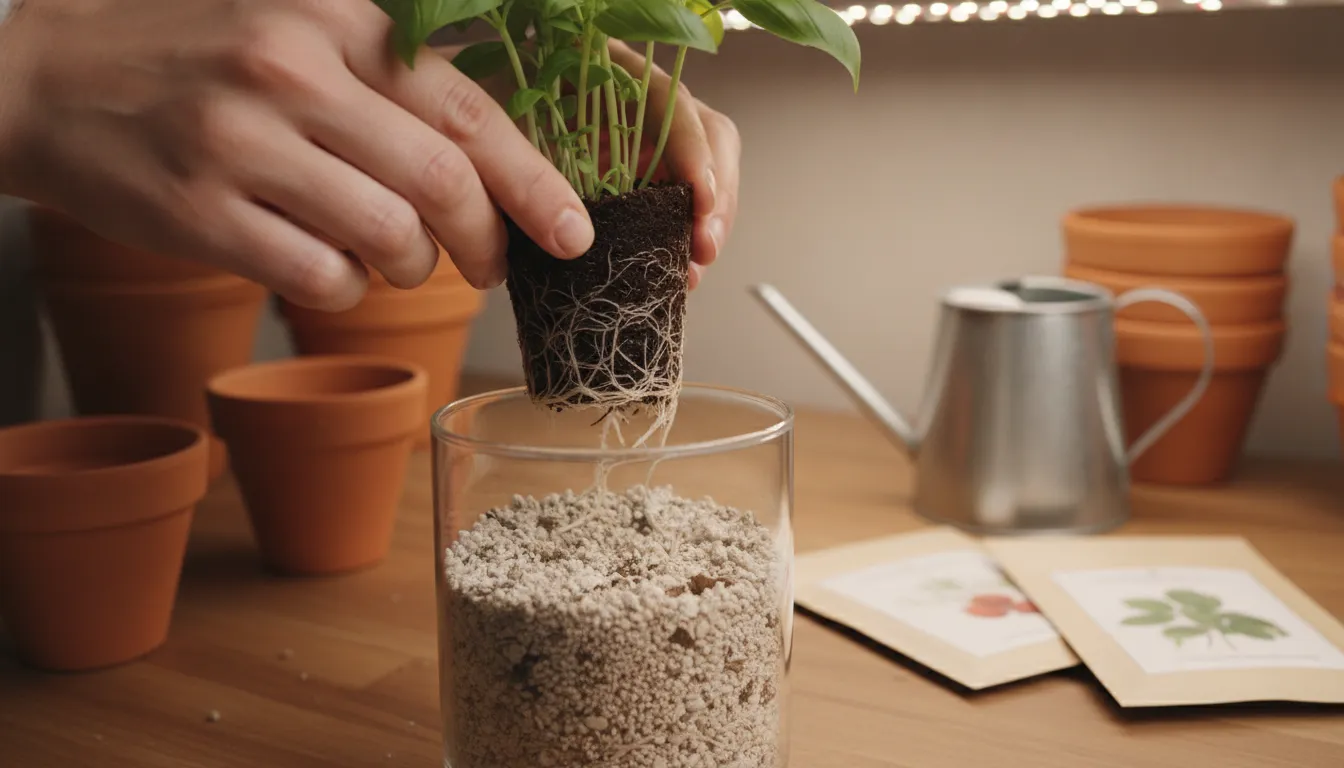
Keep the first days after transplant simple. Avoid stacking several changes at once, such as a new container, intense light, heavy feeding, and a major humidity drop. A steady transition makes it easier to identify the cause if the plant responds poorly.
Why Are Plant Cuttings Not Rooting?
When a cutting fails, inspect the environment before changing everything at once. Most problems trace back to the condition of the parent material, moisture, light, temperature, airflow, or the position of the node.
- The cutting wilts: Humidity may be too low, the enclosure may be too hot, or too much foliage may be losing water. Increase protection from moisture loss and reduce heat, but do not flood the medium.
- The stem turns soft or dark: The medium may be saturated, the tool may have been unclean, or the cutting may have been damaged. Remove decaying material and correct moisture and sanitation problems.
- Leaves yellow: Older leaves can decline after a cutting is taken, but widespread yellowing may indicate stress, poor light, or a damaged stem. Check the base before adding supplements.
- No roots appear: Confirm that a healthy node is below the surface and that the parent plant was vigorous. Some plants root slowly, so use species-specific timing rather than repeatedly disturbing the cutting.
- Mold appears: Excess condensation and limited airflow can create a stale environment. Remove affected debris, wipe the dome, and increase ventilation gradually.
Take notes on the parent plant, cutting length, medium, light, and humidity. If the next batch performs better after one controlled change, you have learned something useful about that plant and your setup.
Find supplies for your next propagation round
Frequently Asked Questions
What is the best way to clone plants from cuttings?
Start with healthy, non-flowering growth. Use a clean, sharp tool, make a cutting with two or three nodes, remove the lower leaves, and place the stem in an evenly moist, well-drained medium. Use a humidity dome and bright, indirect light while roots develop. This method creates a new plant with the parent plant's genetic traits.
Can you clone any plant by cuttings?
No. Many houseplants, herbs, leafy greens, and vegetables can root from stem cuttings, but success varies by species and by the age of the plant material. Check the needs of the specific plant before choosing a cutting method.
How long does it take for plant cuttings to root?
Timing varies by plant, cutting condition, temperature, moisture, and light. Some cuttings show roots relatively quickly, while others need several weeks. Look for firm new growth and several healthy roots instead of pulling on the stem or following a fixed calendar.
Do you need rooting hormone to clone plants?
No. Some plants root readily without it. Rooting hormone can support root initiation for certain cuttings, but it is not a substitute for a healthy parent, clean tools, balanced moisture, and a suitable environment. Follow the label if you choose to use a hormone product.
How do you transition rooted clones into soil?
Wait until the cutting has several healthy roots. Harden it by opening the humidity dome gradually, prepare a clean container with evenly moist medium, and move the roots without bending or crushing them. Keep the plant in moderate light while it adjusts, then return it to its normal conditions as new growth resumes.
For additional plant-care context, see GroIndoor's guides to common indoor growing mistakes and using neem oil on plants. These related resources support the broader care routine that helps parent plants and rooted cuttings remain healthy.
Ready to Choose Your Cloning Supplies?
Successful propagation depends on a clean, consistent setup and the right support for developing roots. When you are ready to prepare your next round of cuttings, explore cloning gels and rooting solutions at GroIndoor.
Tags: