


Learning how to prune indoor plants starts with a simple rule: remove only what you can identify as dead, damaged, diseased, or growing in a direction you do not want. A few well-placed cuts can improve a plant's shape and remove failing growth, but pruning is not a shortcut for fixing poor light, watering, or root problems. Work slowly, use a clean sharp tool, and let the plant guide how much to take.
Choose pruning shears for your plant-care kit
Why should you prune an indoor plant?
Pruning means selectively removing stems, leaves, or growing tips. The goal may be to remove damaged tissue, reduce a crowded shape, encourage branching on a plant that responds to pinching, or keep growth clear of a walkway or window. It is different from routine leaf cleaning: wiping dust from a leaf does not call for a cut.
Start by asking what you want to change. If a single leaf has yellowed, removing that leaf may be all that is needed. If a stem is broken, a cut back to healthy tissue can tidy the injury. If the plant is tall and sparse, pruning may change its outline, but it cannot make up for a light level that is too low. Check the growing conditions before treating every long stem as a pruning problem.
Not every plant responds to pruning in the same way. Some common foliage plants branch readily after a growing tip is removed, while others have a single crown or growth point that should not be cut casually. Some plants naturally shed older leaves. Identify the plant and understand where its new growth comes from before making a substantial cut. When the plant is unfamiliar, limit the first session to dead or damaged material and observe its response.
When is the right time to prune indoor plants?
For many foliage plants, active growth is a practical time for shaping because the plant can resume growth after a modest trim. The exact timing depends on the plant, its condition, and your goal. Removing a broken or clearly dead stem can be appropriate whenever you notice it. A larger shaping job is usually better delayed if the plant is stressed, recently moved, severely dry, or recovering from another major change.
Do not prune just because a calendar says it is time. Look for active, healthy growth and decide whether a cut is genuinely useful. If the plant is in a low-light winter location or has stopped growing, avoid a heavy trim unless you are removing damaged material. Where a species has specific seasonal needs, check a reliable plant-care reference for that species first.
It is also sensible to avoid stacking stresses. Pruning, repotting, moving the plant to a very different environment, and changing its watering routine all at once make it harder to judge how it is responding. If a plant needs a new container, deal with the most urgent issue first and give it time to settle before carrying out optional shaping. University of California Agriculture and Natural Resources' indoor-plant care guidance describes removing about one-third of the soil and roots from the sides and bottom during a particular repotting process; that is a separate procedure, not a pruning target or a reason to remove that amount of a plant's canopy.
What should you check before making the first cut?
Pruning is most useful when the issue is actually a pruning issue. Before cutting, look at the whole plant and compare newer growth with older leaves. One aging lower leaf may be part of normal turnover, while several leaves changing at once call for a closer look at the growing conditions. Check whether the potting medium is unusually wet or dry, whether the plant has recently been moved, and whether pests or physical damage are visible. These observations help you avoid removing healthy tissue while leaving the underlying cause untouched.
Ask whether the plant is leaning, stretching, or losing leaves in one particular area. A directional pattern can point to the plant's position relative to light; shortening stems without reviewing placement may leave the same problem to repeat. Also inspect the plant's base and the stems you plan to keep. If the tissue is soft, discolored, or collapsing, treat that as a plant-health concern and identify the cause before performing optional shaping. When the plant looks generally unwell, restrict cutting to clearly dead or broken growth until you understand what is happening.
It can help to take a quick photo and identify the plant before a larger trim. Look for guidance that names the species or cultivar, since a generic pruning tip may not fit a plant with a single growing point or unusual structure. A modest first cut is easier to evaluate than a drastic redesign, and you can always reassess after the plant has had time to respond.
Which tools should you use for indoor plant pruning?
Choose a tool that makes a clean cut without crushing the stem. Small, soft stems may be pinched or snipped by hand with clean fingers or small scissors. A sharp pair of pruning shears is more practical for firmer stems. Large household scissors can crush or tear thick growth, and a dull blade can leave a ragged wound.
- Small scissors: Useful for thin, soft growth and precise work around compact plants.
- Pruning shears: Appropriate for stems that are too firm for small scissors, provided the cutting capacity suits the stem.
- Disposable scalpel or blade: A sharp blade can make a controlled cut in some situations, but handle it carefully, keep it clean, and store it safely.
- Clean cloth and waste container: Keep removed material off the potting surface and clean up as you go.
For example, pruning shears are one option for sturdier stems, while disposable scalpels provide a different kind of cutting tool. Match the tool to the job rather than forcing a tool to cut material beyond its intended use. Use one plant-care tool at a time, and do not share tools between plants without cleaning them.
Before you begin, remove visible soil or plant residue from the blade. Clean the cutting surface with an appropriate disinfecting method and let it dry as needed. Follow the directions for any cleaning product you use, and do not mix chemicals. If you are dealing with a plant that may have a disease, clean the tool between cuts or between plants so you do not carry residue around the growing area. Wear gloves if the plant's sap or foliage may irritate your skin.
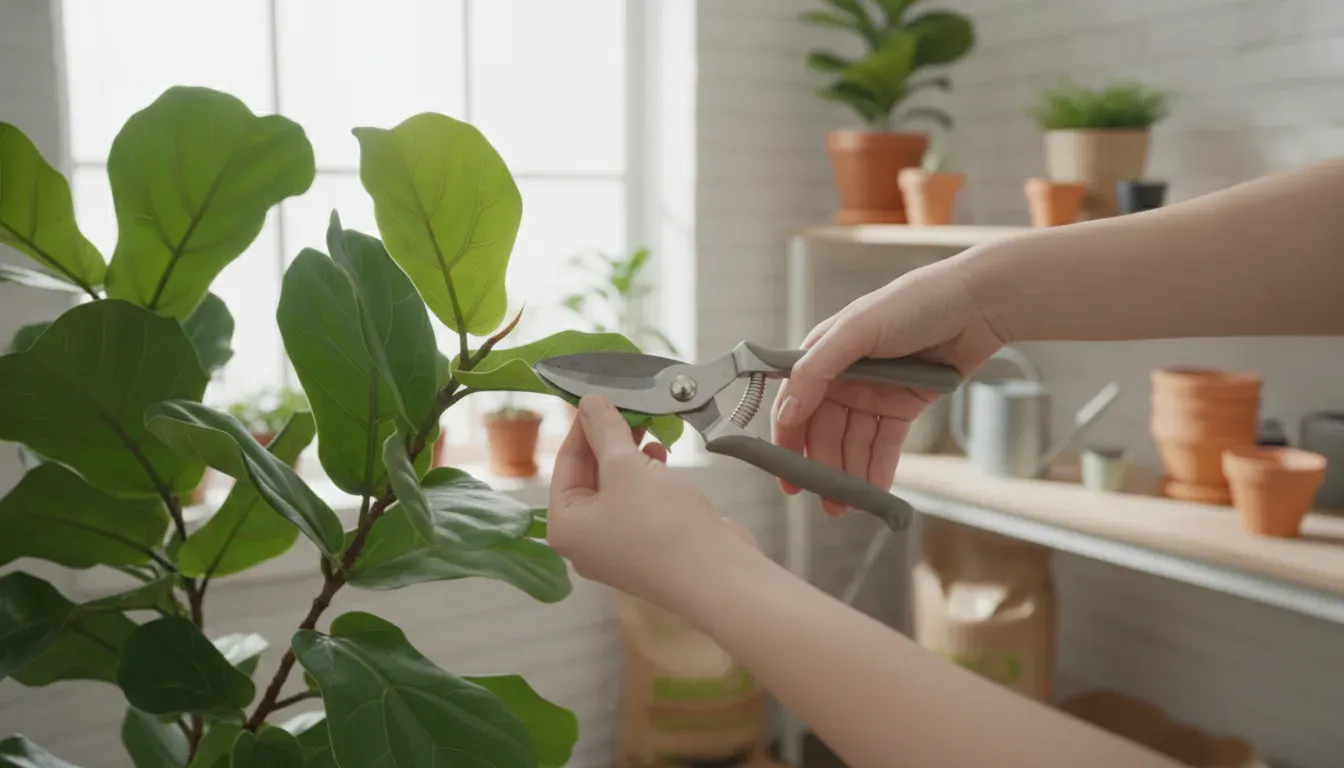
How to Prune Indoor Plants Step by Step
- Inspect the whole plant. Look at the stems, leaf joints, growing tips, and the plant's overall shape. Note what is dead, damaged, diseased, crossing, or simply longer than you want. Check the underside of leaves and the growing medium for other problems that pruning will not solve.
- Set a modest goal. Decide whether you are removing a damaged section, shortening one long stem, or shaping a crowded area. Mark the stems mentally before cutting. If the plant needs major restructuring, consider doing it in stages rather than removing a large portion in one session.
- Find a suitable cut point. For a stem you are shortening, look for a healthy node, the point on the stem where a leaf or bud attaches. When appropriate for that plant, make the cut just above the node without cutting into it. A cut too far above it leaves a long stub; a cut through the node can damage the point from which growth may emerge. For a dead or broken stem, follow it back to healthy tissue or its point of origin, taking care not to injure nearby growth.
- Make one clean cut. Hold the stem steady and use a sharp, clean tool. Do not twist or pull the stem as you cut. Avoid crushing it, and do not leave a ragged edge that can split farther down.
- Pause and reassess. Step back after each cut. Turn the pot if needed and compare the outline from more than one side. Remove another section only if it still supports the goal you set. This pause helps prevent over-pruning while you are focused on one side of the plant.
- Clear away clippings. Pick up removed leaves and stems, then clean the tool and work surface. Do not leave diseased material in the pot or mixed with healthy cuttings.
- Return to steady care. Place the plant back in its usual suitable conditions. Continue observing its moisture and light needs rather than automatically changing its routine because you pruned it.
Cut placement depends on the plant's growth habit. A plant with opposite leaves may have a different branching pattern from one with alternate leaves. Some plants have a central growing point that should remain intact. If you cannot identify a node or tell whether a stem is living, do not guess your way through a major cut. Remove only clearly dead material, take a photo, and identify the plant before continuing.
Find a cutting tool for your pruning task
How much should you remove at one time?
There is no single safe percentage for every indoor plant. A small, healthy plant and a large, vigorous plant do not have the same capacity, and species differ in how they recover. Use the least-cut approach: remove only the growth needed to solve the problem, then allow time to see how the plant responds.
A useful comparison is to decide whether each proposed cut is necessary now, helpful but optional, or purely cosmetic. Remove dead or broken growth first. Make optional shaping cuts only if the plant remains healthy and the result is clear. If you find yourself making repeated cuts because the plant still looks uneven, stop for a moment. A lopsided plant may need time to grow toward better light or may have a natural form that should not be forced into a symmetrical shape.
| Pruning goal | What to look for | Cut approach | When to stop |
|---|---|---|---|
| Remove dead or damaged growth | Brittle, broken, or clearly dead stem or leaf | Follow the affected section back to healthy tissue or its base | Once the damaged material is gone |
| Shorten a long stem | A healthy node near the desired length | Make a clean cut just above the node when suitable for the plant | When the shape is balanced enough, not when every stem matches |
| Reduce crowding | Stems rubbing, crossing, or blocking access to the plant | Choose the least disruptive stem to remove or shorten | When air and access improve without stripping the plant |
| Encourage a fuller outline | A plant known to branch after a growing tip is removed | Pinch or trim a limited number of tips, based on the species | After a few selective cuts; assess new growth before repeating |
What should you do after pruning?
Most plants need consistency more than a special recovery treatment. Keep the plant in suitable light and continue its normal care, adjusting only if you identify a separate problem. Do not apply extra fertilizer or water simply because a cut was made. Overcorrecting can create a new problem while you are trying to help the plant recover.
Watch the cut areas and remaining foliage over the next several days. A clean cut should remain tidy. If a stem continues to die back, recut to healthy tissue with a clean tool, but avoid repeatedly trimming the same area without understanding the cause. If the plant wilts, check its growing conditions and roots before assuming the pruning itself is responsible.
Remove fallen leaves from the surface of the growing medium. If you need to hold up a leaning stem while it recovers, choose support that does not pinch or cut into the plant. A simple plant support may be an option for supporting a stem, but it is not a substitute for correcting a persistent light or growth issue. Keep the support loose enough to avoid constriction and check it as the plant grows.
If a plant has been pruned because its shape is stretched or sparse, review where it sits and how much light it receives. A grow light may be part of an indoor setup, but select and position any lighting based on the plant and the space rather than assuming that pruning alone will resolve stretched growth. Explore four-foot T5 grow lights as one equipment category, and make sure any lighting choice suits your particular plants and growing arrangement.
What pruning mistakes should you avoid?
- Cutting without a goal: Random trimming can leave the plant uneven and remove healthy growth that was not causing a problem. Decide what each cut is meant to accomplish.
- Using a dull or dirty blade: A crushed cut is harder to make cleanly, and residue can be transferred between plants. Clean and inspect the tool before working.
- Cutting too close to a node: Damaging the node can interfere with the growth point. Leave it intact and make a controlled cut just above it when that approach suits the plant.
- Removing too much at once: A severe trim can leave a plant with little healthy foliage. Work conservatively and allow time to assess the result.
- Pruning every plant the same way: Species differ in their growth patterns and response to tip removal. Identify the plant before making structural cuts.
- Confusing symptoms with the cause: Yellow leaves, drooping, or sparse growth may reflect watering, light, roots, pests, or other conditions. Pruning a symptom does not correct its cause.
- Changing several care factors at once: Avoid combining heavy pruning with an unnecessary move, repot, or abrupt care change. Keeping conditions stable makes it easier to evaluate recovery.
If you are unsure whether a patch or stem is diseased, isolate the affected plant from nearby plants while you identify the issue. A hand lens or plant inspection microscope can help you look more closely at small details, but it does not diagnose a problem on its own. Confirm what you see before choosing a treatment, and follow the instructions for any product you use.
How can you tell whether your pruning worked?
Judge the result by the plant's condition and your original goal, not by whether it looks perfectly symmetrical immediately. A successful cleanup removes the damaged material without harming healthy stems. A shaping trim should create a more useful outline while leaving enough healthy growth for the plant to continue growing. Some plants take time to produce new branches or leaves, so avoid repeating cuts simply because change is not instant.
Keep a brief note or take a photo before and after a larger trim. Record which stems you removed and any change you made to the plant's position or care. If the plant declines, that record can help you distinguish the effect of pruning from another change. If you are also refreshing the container or growing medium, choose supplies for the plant's actual needs; review nursery pot options when a suitable container is what you need. A new container is not required just because you pruned.
How does the plant's growth form change your pruning approach?
Use the plant's structure to decide what to remove. A trailing or vining plant can have long stems that are easy to shorten, but first check where its leaves and nodes sit and whether you want to keep the trailing shape. If you want a more compact outline, trim only a few stems at a time and see how it responds before repeating the process. Some cut stems may be suitable for propagation, but do not assume that every plant or every stem will root successfully.
For a plant with upright cane-like stems, distinguish an old or damaged section from a healthy stem that is simply taller than the others. Avoid removing a major stem unless you know the plant can tolerate that type of cut. Plants that grow from a central crown or tight rosette deserve extra caution because removing the central growing point may change or stop the plant's growth. In those cases, limit pruning to damaged outer leaves unless species-specific guidance says otherwise.
Woody indoor plants may need a different approach from soft-stemmed foliage plants. A small pair of scissors may be adequate for tender growth but unsuitable for woody stems. Do not force the blades through a thick stem or crush bark to achieve a cut. Use a tool sized for the material, and research the plant's pruning response before substantial shaping. If you cannot make a clean cut with the tool in hand, stop and choose an appropriate tool rather than applying more pressure.
Also consider the plant's current shape and the room around it. A plant leaning toward a window may need a position or light adjustment, not just a shorter stem. A plant crowding another pot may benefit from more space between containers. Match the solution to the plant and growing method.
Shop pruning shears for your indoor plant-care routine
Frequently Asked Questions
Can I prune an indoor plant at any time of year?
You can remove clearly dead or broken growth when you notice it. For optional shaping, consider whether the plant is actively growing and healthy. Avoid heavy pruning when a plant is stressed or has recently undergone another major change, and check species-specific guidance when timing matters.
Should I remove yellow leaves?
Remove a leaf that is fully yellow, dead, or damaged if it comes away cleanly or can be cut without harming healthy tissue. If many leaves are yellowing, look for the cause, such as a change in watering, light, or plant health, rather than removing leaves one by one and ignoring the pattern.
Where should I cut a stem?
For a healthy stem you are shortening, identify a suitable node and make a clean cut just above it when that fits the plant's growth pattern. For a damaged stem, follow it back to healthy tissue or its base. Do not cut through a growing point you cannot identify.
Do indoor plant cuts need a sealant?
Do not assume that every cut needs a coating. For ordinary pruning, make a clean cut with a suitable tool and keep the plant in appropriate conditions. Follow plant-specific guidance if the species has special requirements.
Can I use the same shears on several plants?
Yes, but clean the cutting surface between plants, especially if a plant may have a disease or pest problem. Remove visible residue first and use a cleaning method that is appropriate for the tool. Let the tool dry as needed before making the next cut.
Prune with a clear purpose, make fewer clean cuts, and give the plant time to respond. When you are uncertain, identify the plant and the cause of the growth problem before removing healthy tissue.
Tags: