


A carbon filter is only effective when the filter, fan, and ducting work as one system. Choose by airflow, not just the diameter printed on the flange, and account for the tent's volume, duct resistance, and the conditions inside the space.
The best carbon filters for grow tents match the inline fan's usable CFM, provide enough carbon bed depth for adsorption, and stay sealed throughout the exhaust path. Activated carbon traps odor-causing volatile organic compounds in its porous structure, but heat, humidity, airflow, and operating hours all affect performance.
This guide explains how adsorption works, how to translate tent size into a practical CFM range. When a filter needs replacement, and how to install it without creating leaks. Start with the filtration principle, then use the sizing and installation guidance to build a setup that exchanges air consistently.
Browse carbon filters and ventilation equipment
How Carbon Filters for Grow Tents Work
Carbon filters for grow tents use activated carbon to remove odor-causing gases from the air leaving an indoor growing space. The process is called adsorption, not absorption. As air passes through the filter, gas molecules adhere to the surfaces inside the carbon bed and remain there instead of continuing through the exhaust duct.
Activated carbon is especially useful because it is highly porous. Commercial activated carbon can have a specific surface area greater than 2,000 m2/g, giving odor compounds a large amount of surface to contact. The published adsorption research documents this high surface area, while the EPA's indoor air treatment review identifies activated carbon adsorption as a method for removing volatile organic compounds, or VOCs, from indoor air. VOCs can move readily as gases, which is why they can travel with exhaust air and create unwanted odors beyond the tent.
Inside the filter, air first moves through a pre-filter that catches larger particles. It then passes through the activated carbon layer. The carbon's pores provide sites where gas molecules can attach. Molecule size and adsorption capacity often have a proportional relationship, while the chemical properties of the gas also matter. Research indicates that activated carbon is effective with non-polar odor gases, so filter performance depends on the compounds present, the carbon quality, and the design of the bed.
That design is more important than the word carbon alone. A deeper, evenly packed carbon bed gives air more contact time with the adsorbent. If air moves too quickly, some compounds may pass through before they can attach to the carbon. This is why the filter's airflow rating should match the inline fan rather than simply choosing the largest fan available.
Temperature and humidity also influence adsorption efficiency. Keeping the tent environment within the operating range recommended for the equipment helps the carbon work consistently. A filter cannot compensate for a leaking duct connection, an unsealed flange, or air that bypasses the carbon bed. The entire exhaust path must be sealed so untreated air does not escape around the filter.
- Adsorption: Gas molecules attach to porous carbon surfaces.
- Surface area: Millions of pores create extensive contact space for odor compounds.
- Contact time: Airflow that matches the filter rating supports better filtration.
- Sealing: Airtight ducting keeps exhaust air moving through the carbon bed.
For the broader setup, see this guide to carbon filter ventilation system setup. Then review GroIndoor's environmental controls to compare filtration and airflow equipment.
Which CFM Rating Matches Your Tent Size?
Choosing carbon filters for grow tents starts with airflow, not just tent dimensions. The goal is to move enough air through the carbon bed to manage odors while exchanging the air inside the tent about once per minute. Start by calculating the tent's volume, then account for the fan, ducting, bends, and the resistance created by the filter.
Use the table below as a practical starting point. The listed fan ratings are approximate operating targets, not a requirement to run the fan at full speed. A speed controller lets you fine-tune airflow after the system is installed.
| Tent size | Filter diameter | Target fan airflow | Sizing notes |
|---|---|---|---|
| 2 x 2 x 4 feet | 4 inch | About 150-170 CFM | A compact inline fan and 4-inch filter are typically sufficient. |
| 4 x 4 x 7 feet | 4 inch | About 150-170 CFM | Use a quality 4-inch setup and account for duct length and bends. |
| 5 x 5 feet | 6 inch | About 400+ CFM | The larger diameter provides more capacity for a higher-volume tent. |
| 8 x 8 feet | 8 inch | 700+ CFM | Plan for a high-capacity inline fan and minimize restrictive ducting. |
These ranges also show why filter diameter matters. A TerraBloom 4-inch filter is listed for airflow up to 350 CFM, while a 6-inch model is listed for up to 550 CFM. Those are real product airflow ratings, not guarantees that every fan and duct layout will deliver the same result. Check the filter's rated CFM, then compare it with the fan's performance under static pressure.
For a closer look at the smaller setup, see our 4 inch carbon filter guide. If your tent needs more capacity, review the 6 inch carbon filter guide. In either case, avoid pairing a powerful fan with an undersized filter. The restriction can reduce usable airflow and shorten the time the system effectively captures odors.
Finally, treat the table as a baseline. If the tent is densely planted, the duct run is long, or the room is warm and humid, choose a fan with reserve capacity and control it down. That gives the system room to overcome resistance while preserving steady air exchange.
How Long Do Carbon Filters Last Before Replacement?
Most carbon filters in a continuously running grow tent ventilation system last about 12 to 18 months. That range is a practical starting point, not a fixed expiration date. The actual service life depends on how much odor the filter handles, how often the fan runs. The quality and depth of the carbon bed, and the temperature and humidity around the filter.
What causes a carbon filter to wear out?
Activated carbon removes odor compounds through adsorption. Instead of simply trapping particles on a surface, the porous carbon holds gas molecules in its internal structure. Over time, those adsorption sites fill. Once the carbon bed is exhausted, air can pass through the filter without receiving the same level of odor control.
Carbon quality matters. High-quality activated charcoal, including Australian charcoal, is selected for filtration performance and durability because its pore structure provides more useful adsorption capacity. A deeper, well-packed bed can also give odor compounds more contact time with the media. Product specifications should therefore be considered alongside the calendar when comparing carbon filters for grow tents. Learn more about activated charcoal filtration.
Humidity, fan schedules, and filter lifespan
High humidity can reduce adsorption efficiency, especially when moisture competes with odor compounds for space within the carbon. Temperature and humidity affect adsorption conditions, so keeping the grow environment within its intended range supports more consistent filtration. Research on activated carbon adsorption emphasizes the importance of maintaining suitable conditions for efficient odor removal: review the adsorption research.
Continuous fan operation moves more air through the bed and exposes it to odors for more hours each day. That steady exchange helps maintain consistent negative pressure, but it may use the carbon faster than an intermittent schedule. Intermittent operation can extend calendar life, yet it may allow odors to accumulate or escape during off cycles. If odor control is a priority, judge performance under the schedule you actually use rather than assuming fewer runtime hours automatically mean better value.
Use odor breakthrough as your replacement signal
The clearest replacement signal is odor breakthrough. If you notice unwanted odor downstream of the filter while the fan, ducting, and seals are working correctly, the carbon bed may be approaching exhaustion. Check for loose duct connections and bypass gaps first. If the system is sealed and odor persists, replace the filter or refill its carbon media if the design allows it.
Refillable filters can extend value because you replace the exhausted carbon instead of discarding the entire housing. They still require careful packing and a properly sealed lid, since channeling lets air bypass much of the media. Whether you choose a disposable or refillable model, inspect performance regularly and plan replacement before odor becomes an ongoing problem.
Where to Place a Carbon Filter in a Grow Tent
Where should you place a carbon filter in a grow tent? In most setups, mount it high inside the tent and connect it to an inline fan so the fan pulls warm. Odor-containing air through the carbon bed before exhausting it. A carbon filter is essential for odor control, while proper ventilation also helps maintain a stable climate and supports efficient air filtration. Use this order when installing carbon filters for grow tents:
- Mount the filter near the top of the tent. Warm air rises, and odors can move with the circulating air. Suspend the filter as high as practical without pressing it against the tent roof. Leave enough room for the pre-filter, duct connection, and safe access to the clamps. The filter can sit inside the tent, or it can be mounted outside when the equipment and duct layout allow it.
- Connect the filter to the inline fan. The common pull-through arrangement places the filter inside the tent, with ducting running from the filter to the fan and then to the exhaust point. A push-through arrangement places the fan before the filter and forces air through it. Pull-through is often easier to inspect and helps keep the filtered side of the system under negative pressure. Whichever method you choose, confirm that the fan and filter use compatible duct diameters.
- Route the ducting to an exterior vent or a planned recirculation point. For exhaust, direct the filtered air outside the tent and into a suitable exterior vent. If the setup recirculates air in the room. Return it to an open area where the fan can draw it back through the tent system without immediately recapturing the same air. Keep the route as short and direct as the room allows.
- Create an airtight seal at every connection. Secure each duct joint with duct clamps, then reinforce the connection with foil tape. Check the filter collar, fan collars, duct ends, and tent port. Even a small leak can let untreated air bypass the carbon bed, reducing odor control and wasting fan capacity.
- Keep the duct run open and uncompressed. Avoid sharp bends, kinks, flattened sections, or unnecessary loops. Restricted ducting adds resistance, reduces airflow, and can make the fan work harder. Support long runs so their weight does not pull the filter or fan out of alignment.
- Keep the pre-filter over the carbon bed. The fabric pre-filter catches dust and larger particles before they reach the activated carbon. Keep it fitted correctly, and clean or replace it when visibly dirty. A clean pre-filter helps protect the carbon bed and can extend the useful life of the filter.
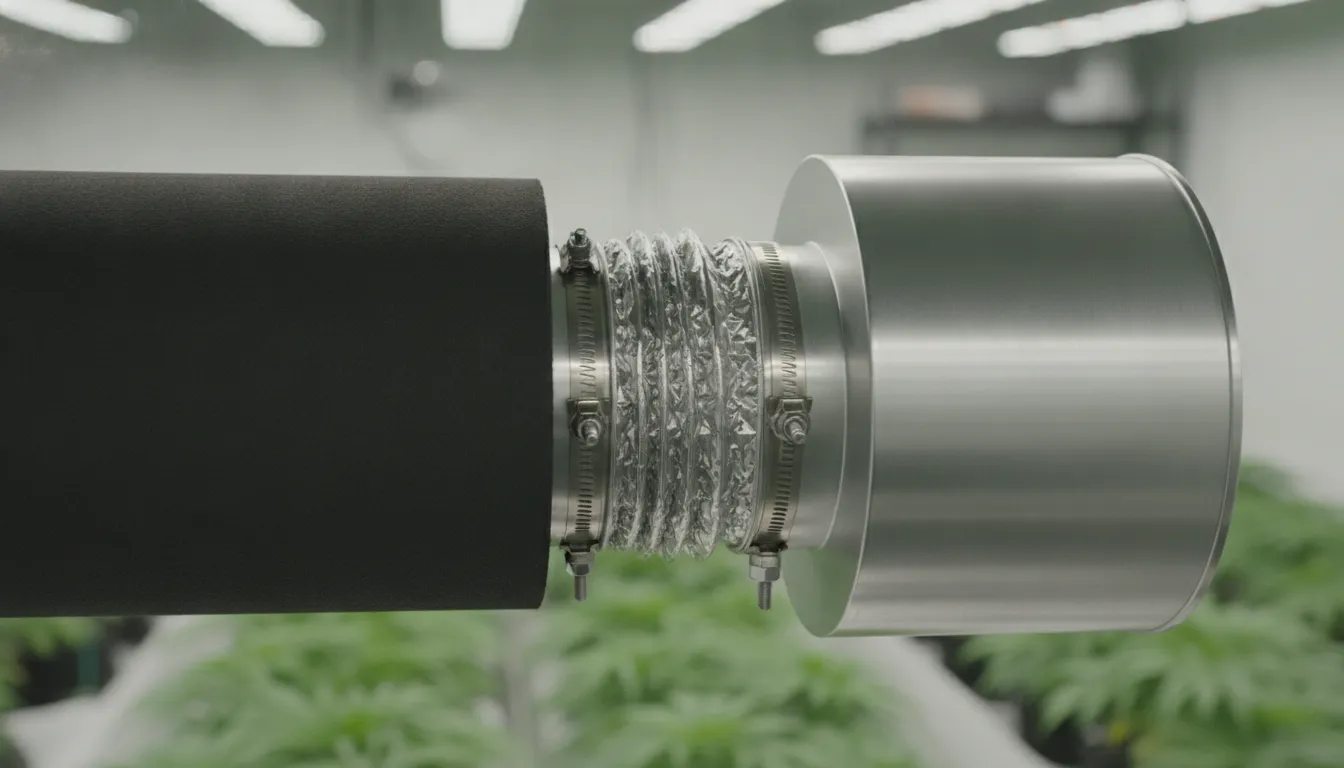
After installation, run the fan and inspect the entire path for air leaks, loose fittings, and unusual noise. Confirm that air is moving through the filter rather than around it. This simple check verifies that the placement, seals, and duct route are working together.
How to Match Your Fan and Filter for the Best Airflow
A carbon filter only works as designed when air moves through its carbon bed at a useful rate. Start by comparing the filter's rated CFM with the inline fan's free-air CFM. Then account for the resistance added by the filter, ducting, bends, clamps, and any intake hardware. The goal is not to force the highest possible airflow. It is to create steady, filtered airflow without overwhelming the filter or starving the tent of exchange.
Choose a filter with a CFM rating that meets or slightly exceeds the fan's expected working airflow. A filter that is too small creates additional resistance. The fan may run loudly while delivering less air than its label suggests. An oversized filter generally gives the system more breathing room, but it can add cost and weight, so size it sensibly for the fan and tent. Common filter listings show why the rating matters: a 4-inch model may be rated for airflow up to 350 CFM, while larger diameters support higher-volume systems.
The fan also needs to be large enough for the filter and the actual duct run. An undersized fan may move air through the filter too slowly. That can reduce the amount of air that contacts the carbon during each pass, often called dwell time, and may leave odor control less consistent. A fan with variable speed gives you room to adjust performance after installation instead of operating at full power all the time.
Static pressure is the missing number in many basic sizing calculations. Every component downstream of the fan resists movement, and flexible ducting becomes more restrictive when it is kinked, compressed, or routed through several sharp turns. Use the fan's performance curve, when available, to see how much airflow it can deliver under resistance. If the system feels weak, first straighten the duct, reduce unnecessary bends, check the pre-filter, and confirm that every connection is sealed.
Temperature and humidity also influence adsorption efficiency, so airflow should be evaluated alongside the tent environment, not in isolation. Research on activated-carbon adsorption identifies temperature and humidity as important operating conditions for efficient odor removal. Keeping the system stable supports both ventilation and filtration performance. For the full installation sequence, follow this carbon filter ventilation system setup guide.
- Pull-through: The filter sits before the fan, and the fan draws air through the carbon. This is the most common arrangement for exhausting filtered air outside the tent.
- Push-through: The fan sits before the filter and pushes air into it. This can work when the layout requires it, but every joint must be sealed so untreated air cannot escape around the filter.
Whichever configuration you choose, match the duct diameter to the fan and filter collars, keep the route short and smooth, and verify airflow at the exhaust. A quiet, consistent system is a better result than a fan and filter whose ratings look impressive on paper but do not work together under real static pressure.
What Size Carbon Filter Do You Need for Common Tents?
This master guide makes filter sizing easier: match the filter diameter and airflow capacity to the tent volume, then account for ducting, bends, and the inline fan. A filter that is too small can restrict airflow and allow odors to escape. One that is substantially oversized is not automatically a problem, but it may require a fan capable of moving air through the larger carbon bed.
As a practical reference, a 4-inch filter can support airflow up to 350 CFM, while a 6-inch filter can support up to 550 CFM. Those are filter capacity figures, not a command to run the fan at its maximum. Your actual fan setting should maintain steady air exchange without collapsing the filter or creating excessive negative pressure.
- 2x2 tent: Choose a 4-inch filter paired with roughly 150 to 170 CFM of usable airflow. A 4-inch unit is more than enough for this compact tent when the duct run is short and relatively straight.
- 3x3 tent: A 4-inch filter remains the practical choice, usually in the 200 to 250 CFM range. It stays within the 4-inch filter's 350 CFM ceiling while giving the tent dependable circulation. For a closer look at this diameter, read the 4 inch carbon filter guide.
- 4x4 tent: Step up to a 6-inch filter, with approximately 350 to 450 CFM of usable airflow. A high-capacity 4-inch filter may work in a lightly loaded setup, but a 6-inch model gives more headroom for duct resistance and fan speed adjustments.
- 5x5 tent: Use a 6-inch filter and target approximately 450 to 550 CFM. This is near the upper end of the 6-inch range, so choose a compatible inline fan and keep the duct path efficient. The 6 inch carbon filter guide covers this diameter in greater detail.
- 8x8 tent: A single 4-inch or 6-inch filter is not enough for this volume. Use multiple filtration zones, typically two 6-inch filters and fans, or a properly engineered larger commercial system. Splitting the airflow helps avoid forcing one filter beyond its rated capacity.
Use these ranges as starting points rather than fixed rules. Long duct runs, sharp bends, dense prefilters, and high humidity can reduce effective airflow. If your setup includes those conditions, select the next larger practical diameter or divide the load between multiple filters. For installation and fan-matching details, see the carbon filter ventilation system setup guide.
Browse carbon filters and ventilation equipment
Frequently Asked Questions
Do carbon filters remove every odor from a grow tent?
They are designed to capture many odor-causing gases as air passes through the activated carbon bed. Results depend on a correctly sized filter, steady airflow, sealed duct connections, and suitable temperature and humidity. A filter cannot compensate for large air leaks or a fan that cannot move air through the filter.
Can you make carbon filters for grow tents yourself?
A DIY filter may be possible for basic dust or odor reduction, but it is harder to control the carbon depth, sealing, airflow resistance, and replacement schedule. A purpose-built filter gives you a stated airflow rating and a housing designed to connect to standard ducting, making performance easier to size and verify.
Should the carbon filter go inside or outside the tent?
For most tent setups, mount the filter high inside the tent and connect it to an inline fan that exhausts filtered air. Keeping the filter near the top helps capture warmer air, while airtight clamps and duct connections prevent unfiltered air from bypassing the carbon bed. An external arrangement can work when space or equipment layout requires it, but every connection still needs a tight seal.
How do you know when a carbon filter needs to be replaced?
Replace it when odors begin passing through despite proper airflow and sealed ducting, or when the filter creates more restriction than your fan can handle. Lifespan varies with operating hours, humidity, odor load, carbon quality, and maintenance, so calendar time alone is not a reliable test. Inspect the prefilter regularly and keep conditions stable to extend usable life.
Ready to Choose the Right Carbon Filter?
Matching the filter diameter and airflow rating to your grow tent can make installation smoother and help your ventilation system perform as intended. Browse the available sizes and related equipment in GroIndoor's Environmental Controls collection, then select the setup that fits your tent and fan.
Tags: