


Grow tent ventilation is the controlled exchange of air that removes heat and moisture while bringing fresh air into an enclosed indoor garden. To size the system, calculate tent volume, use a one-minute air-exchange starting point as a planning heuristic, then add capacity for carbon-filter, duct, and heat resistance.
Shop fans and blowers for your ventilation setup
Quick answer: Multiply tent length x width x height to get cubic feet. Use that volume as the starting CFM, then add about 25% as a planning allowance for a typical filter-and-duct setup. Choose an adjustable inline exhaust fan that can deliver at least the adjusted CFM at operating static pressure, then pair it with a carbon filter and ducting rated for the same or greater airflow.
What Is Grow Tent Ventilation and Why Every Indoor Garden Needs It
Grow tent ventilation is the controlled exchange of air inside an enclosed growing space. An exhaust fan pulls warm, humid, stale air out through ducting, while a passive or powered intake brings fresh air in. Together, these components replace the tent's air volume on a regular cycle, rather than simply moving the same air around inside. For many indoor gardens, the goal is to exchange the full tent volume about every 1 to 3 minutes. Then adjust the system as temperature, humidity, plant size, and equipment change.
That distinction matters. A circulation fan can keep leaves moving and reduce stagnant pockets, but it does not remove heat or moisture from the tent. Ventilation does. If you are comparing enclosure sizes, start with the grow tent collection and consider how each tent's dimensions will affect the air volume you need to manage.
Fresh air supports stronger plant development
Plants exchange gases and water vapor at their leaves. When the air immediately surrounding a leaf becomes still, that boundary layer can slow heat and moisture transfer. Research on airflow in controlled growing environments found that improved air circulation reduced leaf boundary layer resistance and increased sensible and latent heat flux. The same study reported higher fresh and dry weights in plants receiving stronger airflow compared with the lowest-airflow treatment. In practical terms, steady air exchange helps create a more stable environment where plants can manage heat and moisture effectively. Read the supporting research on airflow and plant growth.
Ventilation manages heat, humidity, and air quality
Grow lights, pumps, and other equipment add heat to an enclosed tent. Plants also release water vapor through transpiration. Without a path for that heat and moisture to leave. Humidity can build around the leaves and conditions can become uneven from one corner of the tent to another. Exhausting the warmest air near the top and bringing intake air into the lower portion helps replace that accumulated heat and moisture with fresher air.
Ventilation also contributes to better indoor air quality. The CDC and NIOSH explain that ventilation strategies can reduce the concentration of airborne particles in indoor spaces. Lowering exposure and potential infection-spread risk, although ventilation cannot eliminate risk entirely. In a grow tent, this principle reinforces the value of exchanging air instead of allowing an enclosed volume to remain stagnant. See CDC and NIOSH ventilation guidance.
A properly planned system therefore does more than cool a tent. It establishes a repeatable flow of fresh intake air and exhausted air, giving you a controllable foundation for temperature, humidity, and healthy indoor plant care.
How to Calculate Grow Tent Ventilation CFM for Any Tent Size
Use a simple grow tent CFM calculation to estimate airflow for one complete air exchange. Start with tent volume, then label the resistance allowance separately so the result is a planning estimate, not a guaranteed delivered output.
Start with tent volume
Base CFM = tent volume divided by air-exchange minutes. Multiply length x width x height in feet. For a one-minute starting point, that product is the base CFM.
Adjust for filter and duct resistance
Add about 25% as a planning heuristic for a typical carbon filter and ducting setup. A 4 x 4 x 6.5-foot tent has 104 cubic feet of volume, so the base starting point is 104 CFM and the adjusted starting point is about 130 CFM (104 x 1.25). Long duct runs, sharp bends, restrictive filters, heat, or high static pressure may require additional capacity.
What CFM fan do you need for common tent sizes?
These are starting points, not guarantees. Validate actual fan performance at operating static pressure.
| Tent size | Approx. volume | Adjusted starting point |
|---|---|---|
| 2 x 2 x 5 ft | 20 cu ft | 25 CFM |
| 2 x 4 x 6 ft | 48 cu ft | 60 CFM |
| 3 x 3 x 6 ft | 54 cu ft | 68 CFM |
| 4 x 4 x 6.5 ft | 104 cu ft | 130 CFM |
| 5 x 5 x 6.5 ft | 162.5 cu ft | 203 CFM |
| 4 x 8 x 6.5 ft | 208 cu ft | 260 CFM |
Choose an adjustable inline fan with published airflow that meets the adjusted CFM at the system's operating pressure. A compatible environment controller can adjust speed as temperature or humidity changes.
Compare carbon filters and odor control for your airflow system
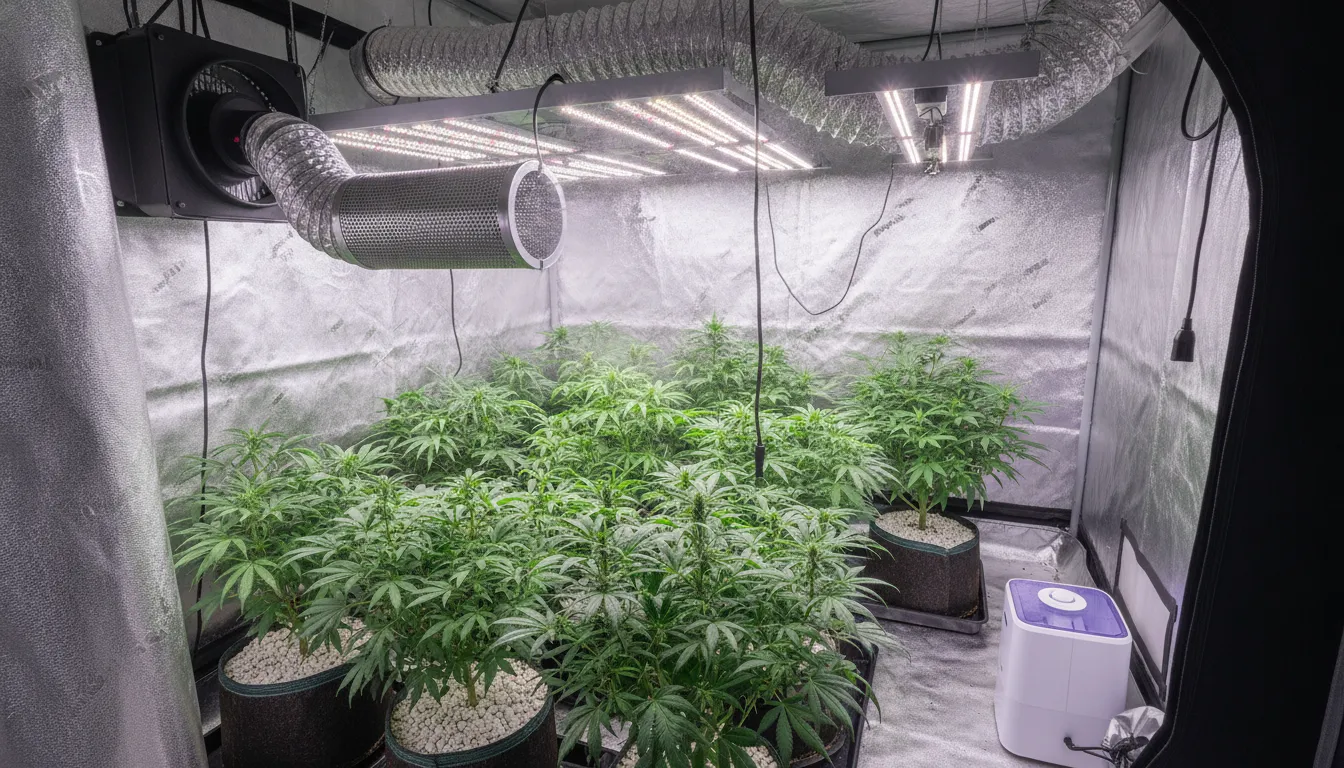
What Size Exhaust Fan Do You Really Need for Your Grow Tent?
Once you have calculated the target CFM for your tent. Choose an inline exhaust fan whose published rating meets or slightly exceeds that number at the pressure your setup will create. A fan's free-air rating is not always its real-world output. Air must move through a carbon filter, ducting, bends, and possibly a silencer, and each component adds resistance.
Use the calculated CFM as your minimum
CFM means cubic feet per minute. A practical ventilation target is exchanging the tent's full air volume about once every 1 to 3 minutes. An inline fan pulls stale air out while a passive or active intake brings fresh air in. This exchange rate supports a steady supply of air rather than allowing heat and humidity to build up. The research basis for the inlet and outlet roles is described in this controlled-environment airflow study.
For a quick starting point, consider these approximate examples. They assume common tent heights, so measure your actual tent before buying. The baseline is one air exchange per minute; the suggested fan range builds in margin for a carbon filter and ducting.
| Grow Tent Size. | Approx. Volume. | Baseline CFM. | Suggested Fan Range. |
|---|---|---|---|
| 2 x 2 ft. | 16 cu ft. | 16 CFM. | 50-100 CFM fan. |
| 3 x 3 ft. | 58 cu ft. | 58 CFM. | 100-150 CFM fan. |
| 4 x 4 ft. | 104 cu ft. | 104 CFM. | 150-200 CFM fan. |
| 5 x 5 ft. | 162.5 cu ft. | 162.5 CFM. | 200-265 CFM fan. |
These figures are sizing references, not guarantees. A densely planted tent, warmer room, high humidity load, or restrictive filter may require more capacity. Add enough margin to keep the fan from running at full speed continuously, but avoid choosing an oversized fan that creates unnecessary noise and turbulence.
Account for static pressure
Static pressure is the resistance that reduces airflow as air passes through the system. A carbon filter is often the largest restriction, particularly when its rated capacity is below the fan's intended output. Match the filter's recommended airflow range to the fan and select a filter that can handle at least the fan's operating CFM. Long duct runs, sharp turns, narrow ducting, and clogged filters also reduce delivered airflow.
When comparing fans, look for an airflow curve or a rated CFM at a stated pressure rather than relying only on the maximum free-air number. The goal is a fan that can still meet your target after the filter and ducting are installed. You can review environmental control equipment when comparing fans, filters, and ducting as one matched system.
Choose adjustable control when conditions change
An adjustable-speed controller gives you room to respond to changing heat and humidity. Run the fan lower when the tent is cool and stable, then increase speed when lights raise the temperature or plants release more moisture. This approach can reduce noise and energy use while preserving the ability to increase air exchange when conditions demand it. Size for the setup's real operating point, then use control to fine-tune the environment.
How to Match a Carbon Filter and Ducting to Your Fan
Match the carbon filter to the fan's working airflow, not only its free-air maximum. Choose a filter whose manufacturer-rated airflow range meets or exceeds the airflow you expect after resistance is included, use the same duct diameter, account for filter and duct resistance, and follow the manufacturer's installation direction.
Match the filter to the fan's CFM
Compare the manufacturer's filter range with the fan's delivered airflow at operating pressure. Keep the duct path as short and straight as practical, seal connections, and recheck airflow after installation.
Keep the duct path short and correctly sized
Use correctly sized ventilation and duct components. For automated temperature or humidity response, select a compatible environment controller and confirm that it supports the fan and sensors.
Where to Place Intake Vents and How to Set Up Ducting for Diagonal Airflow
Good grow tent ventilation depends on more than choosing a fan with the right CFM rating. The location of each opening determines whether fresh air reaches the entire plant canopy or simply takes the shortest path through the tent. A practical layout uses the exhaust assembly high in the tent and intake openings low on the opposite side.
Position the exhaust high
Mount the inline exhaust fan and carbon filter near the top of the tent. Warm, humid air naturally rises, so this position lets the system remove the air that has collected heat and moisture above the plants. The exhaust fan pulls stale air out, while replacement air enters through the intake openings. This continuous exchange supports the broader ventilation goal of replacing the tent's air volume every 1 to 3 minutes, when the system is sized and configured appropriately. Learn the perfect exhaust fan setup for a closer look at the fan and filter connection.
Keep the duct run as direct as practical. Long runs, sharp bends, and compressed sections add resistance and can reduce the amount of air the fan actually moves. Secure each connection with clamps, then inspect the duct for kinks before operating the system. If the exhaust exits into a room, make sure that room has a suitable path for replacement air. Otherwise, the fan may struggle against negative pressure outside the tent.
Use low intake openings on the opposite side
Place passive intake vents or an active intake fan lower on the wall opposite the exhaust. Cool replacement air enters near the floor, travels across the lower part of the tent, and rises through the canopy toward the high exhaust point. This diagonal cross-flow is more useful than placing intake and exhaust close together, where incoming air can be pulled out before it circulates around the plants.
Open enough lower intake area to prevent the exhaust fan from pulling against a restricted inlet. Check the canopy for gentle, even movement rather than a strong blast in one location. Air should reach corners and lower foliage without creating harsh, drying currents. Plants also release water vapor through transpiration, and distributed airflow helps keep that moisture from lingering around leaves or forming stagnant pockets.
Reduce noise without restricting airflow
Insulated ducting can reduce the noise produced by a high-speed inline fan. Use it where sound control matters, but do not crush or sharply bend the insulation around the airflow path. After installation, listen for rattling, check that the fan is exhausting freely, and confirm that intake air is entering from the intended side. For a complete installation sequence, see setting up a grow tent kit.
How to Automate Ventilation for Steady Temperature and Humidity
Manual fan adjustments are easy to miss when room conditions change. A temperature and humidity controller can make the response automatic by connecting your inline fan to sensors inside the growing space. When heat or humidity rises above the selected range, the controller increases airflow. As conditions settle, it reduces the fan speed instead of running at full power all the time.
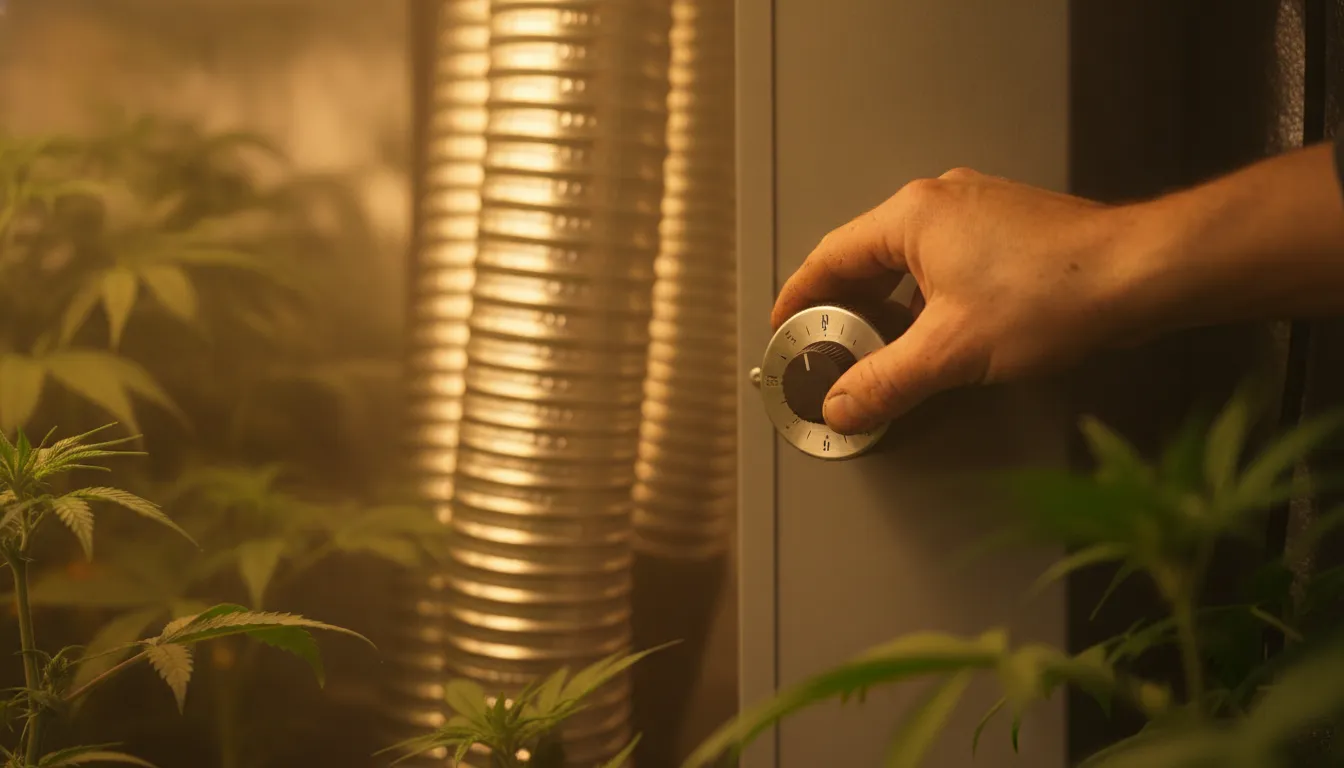
Connect the controller to the inline fan
Place the temperature and humidity probe at plant-canopy height, away from the direct stream of air leaving the fan. A sensor mounted too close to an intake, exhaust port, light, or outside wall can report a distorted reading and cause unnecessary speed changes. Connect the controller to a compatible inline fan. Then set a target range for temperature and relative humidity based on the plants and growth stage in your indoor garden.
There are two common control approaches. A basic controller turns the fan on when a high-temperature or high-humidity threshold is reached. A variable-speed or smart controller can ramp the fan gradually, which avoids abrupt changes and usually produces a steadier environment. If the fan has a minimum speed setting, keep enough baseline airflow moving through the tent to prevent stagnant pockets even when the room is within range.
Use sensor placement and airflow together
Automation works best when the physical ventilation layout is already sound. Exhaust hot, humid air from the upper part of the tent, while passive or active intake brings fresher air in lower down. This gives the controller a meaningful way to remove heat and moisture rather than simply reacting to a poorly mixed environment. A complete system normally includes an inline fan, suitable ducting, and, where needed, a filter matched to the fan.
Plants release water vapor through transpiration, so humidity can build around leaves even when the room average looks acceptable. Continuous circulation and responsive exhaust help reduce those local differences. More broadly, ventilation is used to lower the concentration of airborne particles in indoor spaces, although it cannot eliminate every exposure risk. See the CDC ventilation guidance for that distinction.
Check the system before leaving it unattended
After programming the controller, watch several heating and watering cycles. Confirm that the fan responds when the probe crosses each threshold, that it returns to the minimum speed once conditions stabilize, and that the intake is not restricted. If the fan cycles constantly, widen the acceptable range slightly or adjust the ramp settings. If humidity remains high despite maximum speed, inspect ducting, filter loading, room air exchange, and moisture sources rather than lowering the setpoint indefinitely.
Keep the probe clean and check its readings against a second meter occasionally. Dust, condensation, or a probe positioned against a surface can slowly undermine the controller's accuracy. It is also useful to record when the fan reaches higher speeds. A pattern tied to lights, irrigation, or changes in room temperature can reveal a ventilation or moisture issue before plant stress becomes visible.
For compatible fans, sensors, and related environmental control equipment, choose components that support the airflow capacity and control method your tent requires.
Common Grow Tent Ventilation Mistakes to Avoid
A reliable grow tent ventilation setup does more than move air past the plants. It must deliver enough exchange, overcome resistance from filters and ducting, and keep air moving through the entire canopy. Small setup errors can create uneven temperature and humidity, even when the exhaust fan appears to be running. Avoid these common mistakes before they become plant-health problems.
- Undersizing the exhaust fan. A fan that barely matches the tent's calculated air volume may struggle when the tent is warm, densely planted, or fitted with a filter. The result is slow air exchange and less control over the growing environment. Fix: calculate the tent volume, choose a fan capable of exchanging that volume at an appropriate rate. And leave practical capacity for the rest of the setup instead of running at maximum speed all the time.
- Ignoring static pressure. Carbon filters, long duct runs, sharp bends, and restrictive screens all make an inline fan work harder. Using the fan's free-air CFM rating as if it were the working output can leave the tent under-ventilated. Fix: account for the resistance created by every connected component. Keep ducting as short and straight as practical, and match the carbon filter to the fan's CFM rating so odor scrubbing does not add unnecessary restriction.
- Placing intake and exhaust openings without a planned airflow path. When both openings sit too close together, fresh air can leave before it reaches the plants. When the canopy has no gentle circulation, corners and lower areas can develop stagnant pockets. Fix: position the intake low and the exhaust high, then use an appropriately sized circulation fan to move air across the canopy without blasting plants directly. Check the corners, floor, and spaces beneath dense foliage, not just the center of the tent.
- Letting humidity linger around the leaves. Plants release water vapor through transpiration, which can raise humidity in the air immediately surrounding the foliage. If that moisture is not carried away, localized pockets can support mold and bud rot during flowering. Fix: monitor humidity at canopy height, maintain steady air exchange, and adjust exhaust or dehumidification when readings stay elevated. Good circulation also helps prevent tipburn, a common controlled-environment plant issue documented in research on airflow and plant growth (peer-reviewed airflow research).
Inspect airflow after plants fill the tent, because a layout that worked with small plants may not reach the canopy later. Look for relaxed, gently moving foliage and consistent readings across the growing space rather than relying on the fan's sound or a single sensor.
Frequently Asked Questions
How do you calculate CFM for a grow tent?
Multiply length x width x height in feet to find tent volume. Use a one-minute exchange as a planning heuristic, then add about 25% for a typical filter-and-duct setup. Add more capacity for long ducting, bends, restrictive filters, or heat.
What CFM fan do you need for a 4x4 tent?
A 4 x 4 x 6.5-foot tent is about 104 cubic feet. The base starting point is 104 CFM, and a 25% planning allowance gives about 130 CFM. Choose a fan that can deliver at least that airflow through the actual filter and duct system.
Should a carbon filter match the fan's CFM?
Yes. Choose a filter rated for at least the fan's working airflow and match the duct diameter. Compare delivered airflow at operating pressure because filters and ducting create resistance.
Where should intake and exhaust vents go?
Place exhaust high where warm air collects and intake low on the opposite side when possible. This creates a diagonal air path. Keep intake clear and use a circulation fan to distribute air.
Do you need an environment controller?
A compatible environment controller is useful when you want the exhaust fan to respond automatically to temperature or humidity. Confirm compatibility, but remember it does not replace correct sizing, a clear intake path, or a suitable filter and duct system.
Ready to Improve Your Grow Tent Ventilation?
The right combination of fans, filters, and ducting can make airflow easier to manage throughout your indoor garden. Match tent volume to equipment capacity, then validate performance at operating pressure.
Tags: