


A co2 controller can automate equipment, but choosing one involves more than matching a display to a desired number. Use this checklist to assess its sensor, control behavior, compatibility, alarms, and failure response before you buy or install it.
Review a CO2 monitor and controller
What should a safe controller do?
A suitable controller should measure the room, compare the reading with a user-selected target, and operate only the equipment it is designed to control. You should be able to tell what it is measuring, what output it is activating, and what happens if a reading or connection fails.
Think of the controller as one part of a system, not a safety device by itself. A display, relay, or automated output does not guarantee that gas is being delivered correctly or that a room is safe to enter. Follow the equipment manuals, applicable codes, and local requirements. If the setup involves a fuel-burning generator, permanent gas piping, or electrical work beyond your competence, use a qualified professional.
- Measure: A suitable sensor measures the room air where the reading matters.
- Decide: Control logic follows a clear setpoint, differential, and schedule, as supported by the model.
- Act: The output is compatible with the intended device and does not exceed its ratings.
- Alert: The user can recognize abnormal readings, faults, and active outputs.
- Fail safely: A sensor or power problem does not silently leave an unsafe process running.
Which sensor details should you check?
The sensor is the foundation of the control loop. Before comparing features, identify the sensor type and its stated measuring range, accuracy, operating conditions, and replacement or calibration guidance. Check the manufacturer documentation rather than assuming that two controllers with similar screens measure in the same way.
Is the sensor built in or remote?
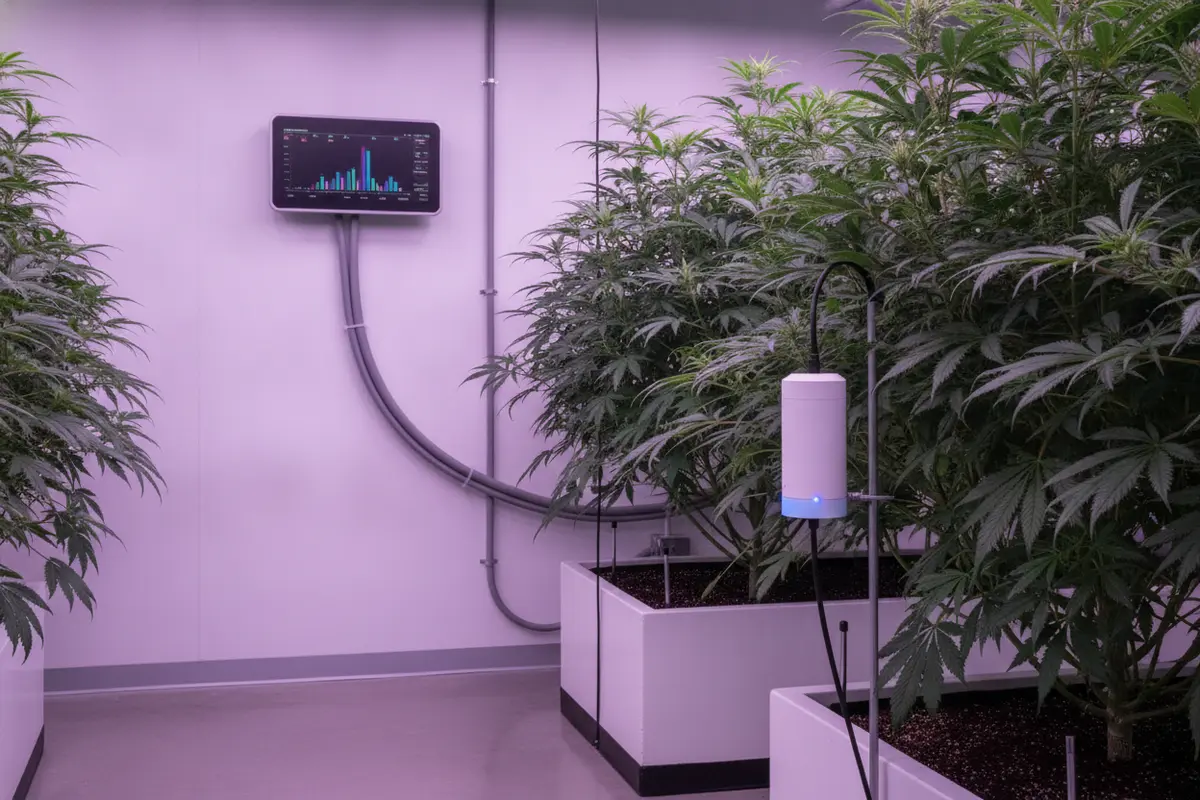
A built-in sensor measures conditions near the controller. That can be convenient when the unit is placed in the right location, but it may not represent the air around the plants if the controller is mounted outside the growing area. A remote sensor lets you locate the measurement point separately, but you must confirm the cable length, connector, extension limits, and protection requirements.
Plan sensor placement before buying. Keep it away from direct water spray, strong drafts, and a direct stream from a supply outlet unless the manufacturer says otherwise. A sensor close to an injection point may detect a concentrated pocket rather than the room's mixed air. A sensor hidden behind equipment or placed outside the intended zone may also give a misleading impression. The instructions for the specific controller take priority.
How will you verify and maintain readings?
Look for clear instructions on calibration, verification, sensor life, and fault indication. Ask whether the controller can show a fault when a sensor is disconnected or out of range. If a product requires periodic service, record the interval and method in the maintenance routine. Do not assume an apparently stable display proves the sensor remains accurate.
For a room with changing airflow, placement should be evaluated under ordinary operating conditions. Observe how the reading responds when ventilation changes, doors open, or equipment switches on. Avoid moving the sensor each time the display looks unexpected; first check its location, connections, and the manufacturer's troubleshooting sequence. For more equipment choices, browse grow room monitors and compare the functions needed for your setup.
How should you evaluate setpoints and control behavior?
Controllers differ in the way they turn a reading into an output. Review the manual to understand the adjustable range, display units, switching differential, delay, schedule, and any minimum on/off time. These details determine whether the system cycles predictably or responds to every small change in the measured value.
Do not choose a target by copying a number from another room or controller. The appropriate operating target depends on the growing plan, equipment, and applicable guidance. Use the instructions for the equipment and the needs of the plants; do not treat a controller's available range as a recommendation. Set the control only after you understand what the value means and what equipment will respond.
- Confirm whether the screen displays the measurement in the units you expect.
- Check whether the setpoint can be locked or protected from accidental changes, if that feature matters in a shared space.
- Understand the differential or deadband: it can prevent rapid switching around a target.
- Check whether timers or delays affect when an output activates or stops.
- Review what happens after a power interruption. Determine whether settings are retained and whether outputs restart automatically.
A useful test is to write down a sample sequence: the measured value rises, the controller reaches its trigger condition, the output activates, and the output stops when the control condition is met. Then check the manual to confirm each step. If you cannot explain the sequence in plain language, do not connect a gas source until the behavior is clear.
Will the controller work with your equipment?
Compatibility is both electrical and functional. Identify the exact device the controller will switch, then compare its requirements with the controller's output type and rating. Check voltage, current, plug or terminal style, load type, and whether the controller is intended to switch that kind of load. A matching plug does not prove that a connection is safe or supported.
Some units provide a switched outlet; others use a low-voltage control signal or a dedicated connection. Do not use an adapter to overcome an unclear mismatch. Never exceed the output rating or bypass a safety interlock. If the equipment manual does not explicitly confirm a compatible control method, ask the manufacturer or a qualified installer before proceeding.
| Checklist item | What to verify | Why it matters |
|---|---|---|
| Sensor | Type, range, accuracy, location, and service instructions | The controller can only respond usefully to a suitable measurement. |
| Control logic | Setpoint, differential, delay, schedule, and restart behavior | These settings define when an output starts and stops. |
| Output | Output type, voltage, current rating, and supported load | A mismatch can damage equipment or create an unsafe connection. |
| Connected device | Manufacturer-approved control method and fail behavior | The controller and device must operate together as intended. |
| Protection | Alarm, fault indication, shutoff, and manual override options | People need to recognize and respond to abnormal operation. |
| Room plan | Sensor location, airflow, access, and applicable requirements | Placement and room conditions affect monitoring and response. |
If your plan includes ventilation equipment, confirm how controller outputs interact with it. A control signal that starts one device may conflict with a separate thermostat, timer, or room controller. Review the cooling thermostat's control role alongside the proposed CO2 equipment, and make a simple wiring and operating diagram before installation. For duct connections, use correctly matched components such as a duct reducer only where the airflow plan and equipment instructions call for one.
Compare a controller with a remote sensor
What safety features deserve a closer look?
Read the manual for alarms and fault handling rather than relying on a product name or feature list. A controller should make it apparent when a sensor is disconnected, a value is outside its range, or a controlled output is active, if those conditions are supported by the model. Learn how to silence or acknowledge alarms without disabling protection.
Consider what the system does when the sensor stops reporting, the reading is implausible, or power is lost. Does the output switch off, remain in its last state, or restart when power returns? There is no safe universal assumption for every model. Determine the specific behavior in advance and choose a setup that does not rely on an unattended controller to resolve a fault.
Also consider independent safeguards. Depending on the application and local requirements, that may mean an appropriate alarm, access controls, ventilation procedures, or a separate monitoring method. A controller's display is not a substitute for a dedicated safety alarm where one is required. Keep the room accessible, make the control status visible to the person responsible, and ensure everyone who may enter understands the response plan.
What should you do before using a gas source?
- Read both manuals. Confirm the controller's output and the source equipment's approved control interface.
- Inspect the installation. Check sensor position, wiring, connectors, hoses or pipes, and any shutoff devices according to their instructions.
- Test without gas delivery. Where the manufacturer permits, verify the display, alarms, schedules, and output indication before enabling the source.
- Confirm shutoff access. Know how to stop the source manually and who is responsible for doing so.
- Document settings. Record the target, differential, schedule, and output behavior so another responsible person can review them.
Do not test a system by intentionally raising room concentrations or creating a leak. Use only the test procedure provided by the equipment manufacturer. If the instructions do not explain how to test a function safely, seek qualified help instead of improvising.
How does the controller fit into the room?
Make a basic room map that shows the sensor, source, plants, air movement, ventilation equipment, controller, and any alarm. This helps reveal practical conflicts before installation. For instance, a sensor directly beside an outlet can experience a different reading from one located in the general growing area. A controller installed where it is hard to see can make an active output or fault easier to miss.
Plan cable routing and physical protection. Keep connections organized and away from moisture, heat, and places where they may be pulled or crushed, following the product instructions. Secure equipment so that routine access does not disturb sensor placement. If the room uses flexible ventilation ducting, review the intended airflow path and the duct clamps and tape options needed for the installation rather than improvising a connection.
Room conditions change over time. A new fan, altered duct route, moved bench, or shifted plant canopy can affect where air mixes and where a sensor should sit. Recheck the layout after changes. If you are selecting an enclosure as part of a new room, compare 4x4 grow tents or a 2x4 tent option based on available space, access, and the complete equipment plan, not just nominal footprint.
How can you compare controller options?
Use a short requirements sheet before comparing models. Separate must-haves from conveniences. A remote sensor may be essential for your planned mounting position; a schedule may be helpful but not necessary. The point is to compare equipment against the room and connected devices rather than selecting based on the longest feature list.
- Must fit: sensor placement, measurement range, output type, load rating, and environmental conditions.
- Must explain: calibration or verification, fault behavior, alarms, manual shutoff, and restart behavior.
- May improve routine: remote sensing, readable status indicators, data logging, adjustable delays, or a schedule.
- Must be supportable: instructions and technical support that answer your actual compatibility questions.
Compare the total system, not just the controller. Include the compatible sensor, mounting, cabling, switching device, ventilation, and any required safety equipment. Avoid assuming that a controller includes accessories or works with every source. Confirm included parts and supported configurations with the product documentation before ordering.
When you have narrowed the choice, ask these practical questions: Can I tell what the sensor is measuring? Can I explain what makes the output switch on and off? What happens if the sensor disconnects? How do I stop the source? Will the controller's output safely operate the exact device I own? If any answer is unclear, pause and resolve it before installation. You can also review related environmental equipment when planning the broader room, but do not assume another device can replace the controller's intended function.
What should you check during commissioning and routine use?
Commissioning is the controlled handoff from installation to regular operation. Follow the manufacturer's procedure and local requirements. Start with a visual inspection, verify settings, confirm that the display is responsive, and test alarms and outputs using only an approved method. Keep a written record of the settings and date, especially if several people may operate the room.
The UNECE Checklist System for Safety Reports is an example of a structured safety-report checklist, not a CO2-controller installation standard; follow the instructions for the specific equipment and local requirements for the actual setup.
- Confirm the sensor is secured in its planned position and the cable is undamaged.
- Check that the display units and settings match the written plan.
- Verify that the connected equipment is identified and within the controller's ratings.
- Check that the output status is understandable and that the manual stop is accessible.
- Review any fault or alarm indication, and confirm the response steps with everyone responsible.
- Recheck after moving equipment, changing airflow, updating settings, or servicing the sensor.
Keep a simple log of routine checks, maintenance, unusual readings, and repairs. A log does not prove that a system is safe, but it helps reveal repeated faults and shows when a sensor or setting was last reviewed. Follow manufacturer intervals for calibration or replacement, and do not keep operating equipment with a fault that the manual says requires service.
If readings behave unexpectedly, first check the sensor location, connection, settings, and operating conditions. Compare the situation with the troubleshooting steps for the specific model. Do not compensate for a questionable sensor by changing the target or overriding alarms. Stop the controlled process if needed, follow the manual, and get qualified assistance when the cause is uncertain.
Review controller details for your setup
Frequently Asked Questions
Can one controller operate any CO2 source?
No. The controller's output must match the source's approved control interface and electrical ratings. Check the manuals for both devices and confirm the exact model combination before connecting them.
Where should a remote sensor be installed?
Use the location recommended by the controller manufacturer and the plan for the room. Avoid placing it where direct spray, a strong draft, or a concentrated stream from an outlet can distort the measurement. Reassess placement after changing the room layout or airflow.
Does a controller replace a separate safety alarm?
Not automatically. A controller display or fault alert may serve a different purpose from an alarm designed to warn people about room conditions. Follow applicable requirements and the recommendations for the equipment and room; use independent safeguards when required.
What should happen if the sensor fails?
Find the model's documented fault behavior before installation. Do not assume that the output turns off or that settings remain safe after a sensor fault or power interruption. If actual behavior differs from the manual or is unclear, stop and get support before using the system.
A careful controller choice starts with the measurement and ends with a tested, understandable response plan. Confirm every connection and safeguard for the specific equipment, and pause for qualified help whenever compatibility or safe operation is uncertain.
Tags: